
I am trying to update this page as the construction work proceeds. The bottom of the page will show what is happening now.
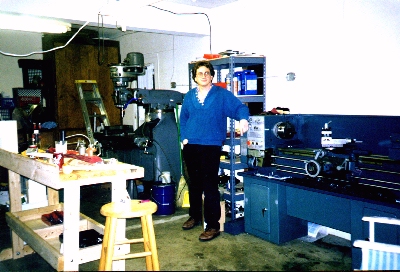
Before a couple of items were added, a metal band saw, and a 3-in-1
sheet metal machine. Because that was a rental house, the wiring was all
placed on the wall, tapped into the main distribution panel (a technique
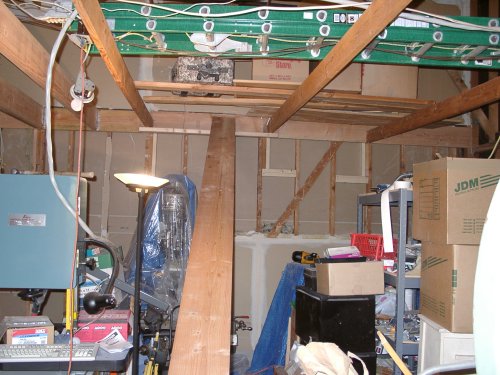
I call "exowiring" :). Note also the large beam crossing the garage, which
gave me a lot of trouble moving in and out. In addition, it had a standard
swing up door, which I had to remove and replace several times to get some
of the larger machines in and out.
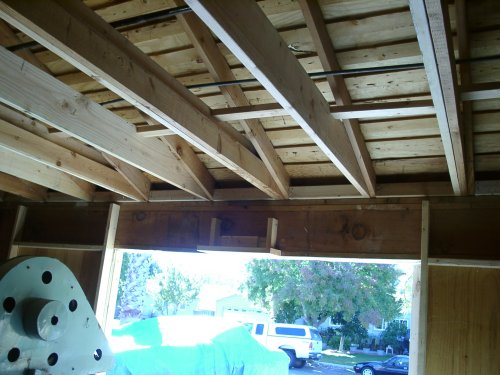
The garage looked like this:
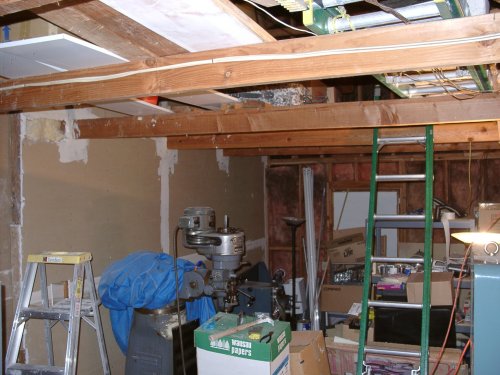
Most of the walls were covered, but the ceiling was left uncovered (bare rafters). The joists were 48" on center. Silly me, I thought it was just a matter of adding a new joist between each existing one, to make it every 24" on center, then add a ceiling.
Turns out I had a big surprise coming. Those joists are 244" (20'4") long, 2x6 lumber. They are below code to support ANYTHING, even the weight of a ceiling. The house builder saved a couple of bucks on lumber, and these joists are the BARE MINIMUM required to keep it from falling down.
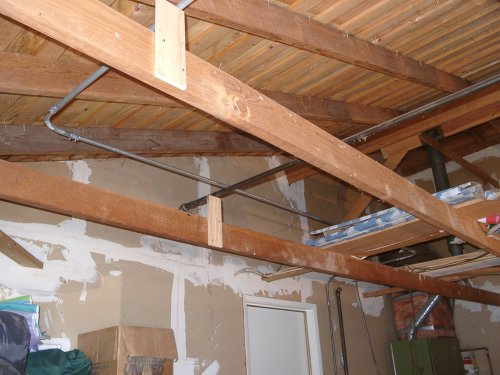
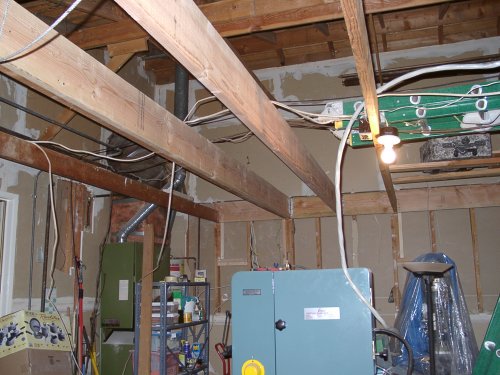
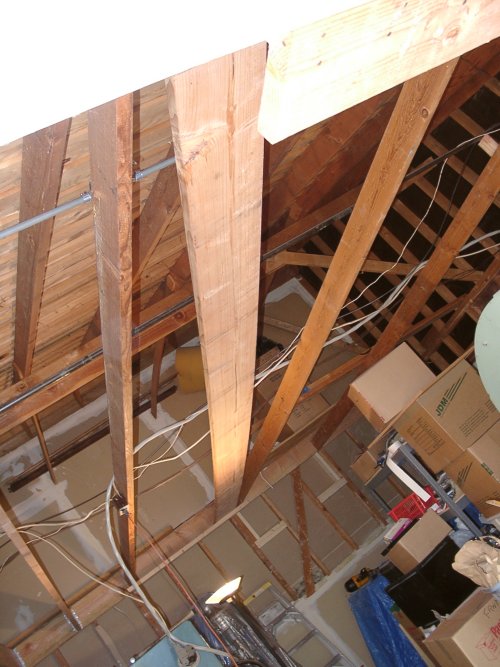
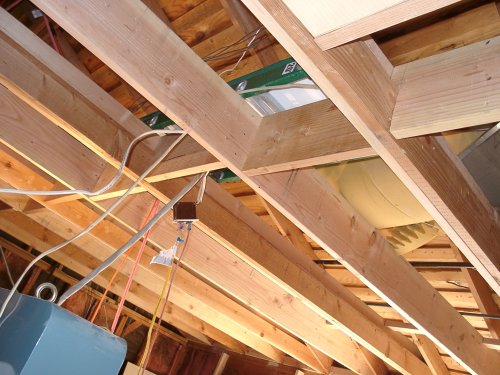
The answer from the city building department was to "sister" or double up the joists with 2x10 lumber, and then add the extra joists to get 24" on center. But that is not so simple, as the following pictures show:
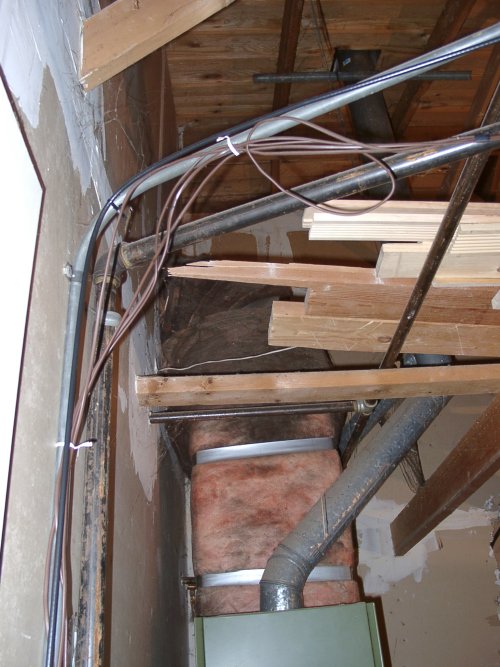
All that piping and electrical runs straight over the joists. The answer is: rip it all out and reinstall it 4 inches higher, to accomodate the new 2x10s. And that is how a fairly simple project, adding a ceiling, lights and electrical outlets, turns into the PROJECT FROM HELL.
The first step was actually taken two years ago. The garage door was falling apart when I got the house. So I removed it, and put 4 sections of 4x8 panels in, two doors and two fixed panels. This treatment is entirely removable, so when I move, I just replace this with a regular roll up garage door, probally one of those slide up panel jobs that are popular now.
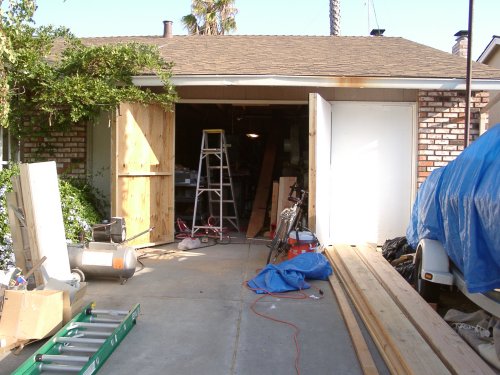
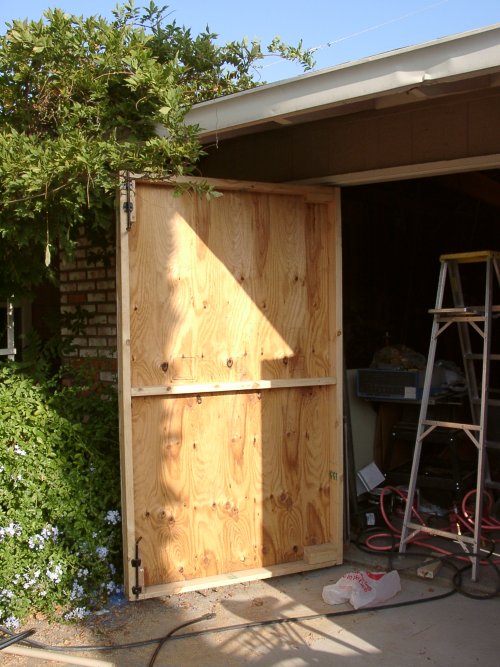
I am really proud of the door treatment I came up with. It has the exact properties I needed for the shop:
Anyways, on to the new construction.
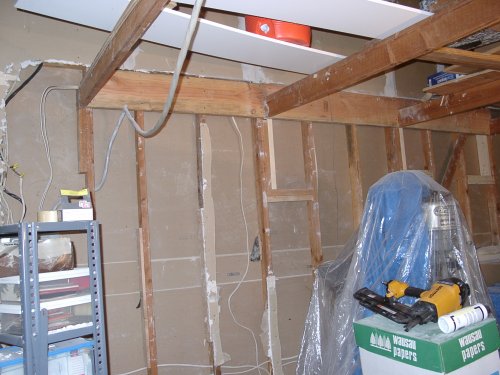
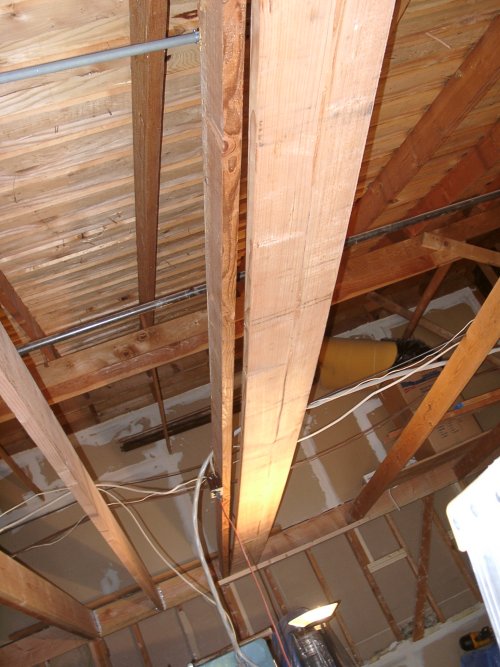
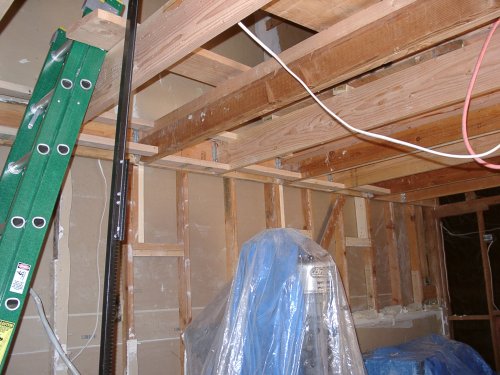
Step one was to disconnect and reroute the plumbing and electrical 4" higher:
Notice that I have placed the gas pipe and electrical up 4" on boards nailed to the existing 2x6 joists. This places them at the right height to clear the 2x10s. I just remove the supports as the joists go into place.
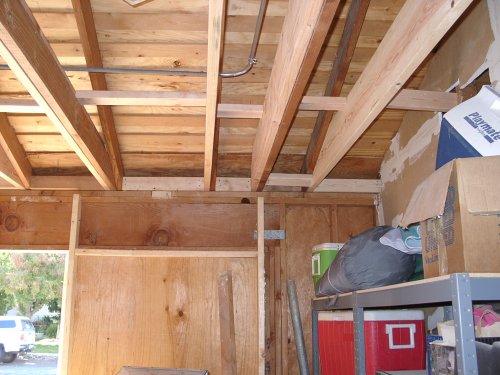
Next, the rear wall gets "denuded", and "ledgers" are installed. These are boards that take the new joists:
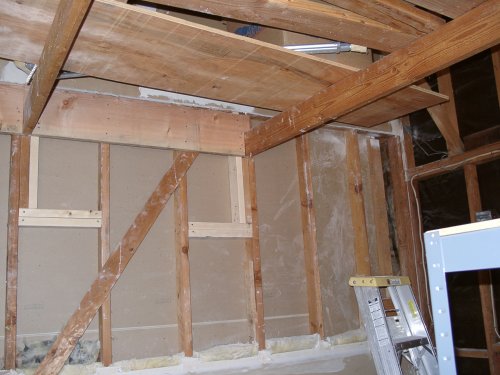
Note that the ledgers hook over the existing 2x6 joists where possible, and that I added a "cripple stud" where a stud did not already exist, for the ledger to nail to.
After I removed the wallboard, I found that the old 2x6 joists, which were simply sidenailed and underpinned by a short board, were walking out of place by 1/4" on average. The cheap treatment given the old joists showed. The garage was in fact trying to disassemble itself bit by bit. Probally the wallboard was all that was keeping this process from advancing further.
The new ledger system locks the old joists in place, and their supports, as well as providing a solid attachment for the new joists. Then, the new joist in turn lock the ledgers to the back wall, and the studs transfer the load to the cement footing.
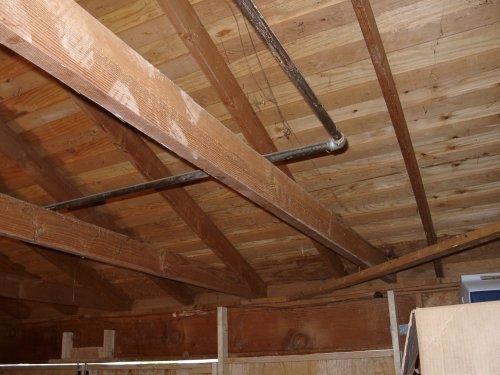
Now the new joists go in:
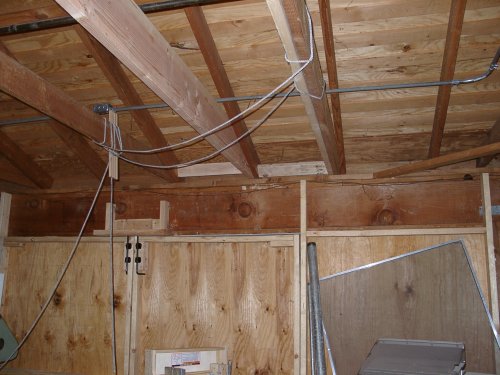
The joists now connect to each rafer on 24" centers. Where the joists join the front rafers, I added a "short blocking" of 2x4. The original builder didn't use blocking there, and it showed. The original joists were twisting out of place. I used a 2x4, instead of a full 2x10, so as not to unecessarily impede access to the bottom of those rafters and their soffet plates.
Those ropes you see were used to insure against a joist slipping out of place before it was nailed.
After placing a couple joists, I learned a technique I call the "rack and drag" to place them. Its based on the idea that the triangle formed by a 244" joist and the 48" space between the existing joists gives a diagonal of more than 4" extra clearance. A 2x4 is nailed 1' from the back wall, to the bottom of the old joists. This gives enough ledge to hold the end of the new joists, without much danger of them slipping out. Then, each new joist is placed on diagonal and lifted into place over the front header. The sistered joist is placed first and nailed, then the spaced joist. The result is faster and safer placement of the joists, which are fairly heavy, and could break something if they slip.
Heres the "rack and drag" in action:
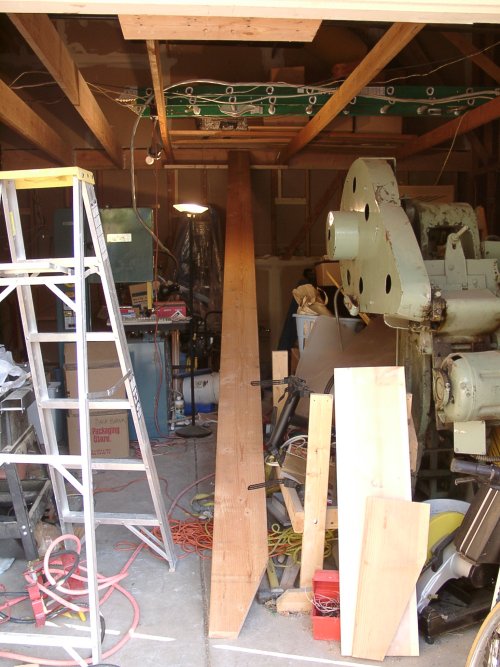
Now the joist goes up into the space over the header:
And slides into place:
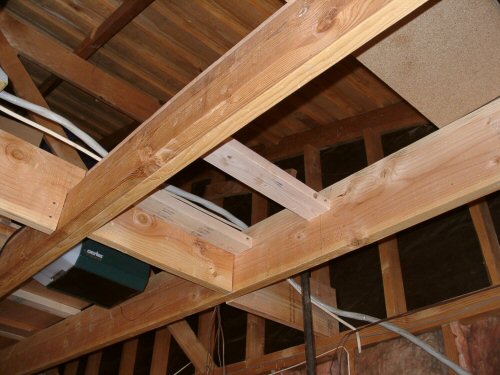
And now, all joists in place, with my blocking treatment apparent.
The blocking at the bottom serves as both the top of the ceiling edge and a bottom block. The tops are blocked separately. Its all green lumber, the only kind they sell around here, and I didn't want it to warp like I saw most of the old joists were doing. So I went wild with blocking. Hey, homeowners don't have to be efficient.
Above is the mid line blocking. Keep in mind that none of this is required by the code. But I sure could feel the joists getting more solid after I did this.
Heres the blockng on the back wall (above). Blocking right in front of the joist hangers is probally really going overboard. I am just not sure how much I trust the hangers yet.
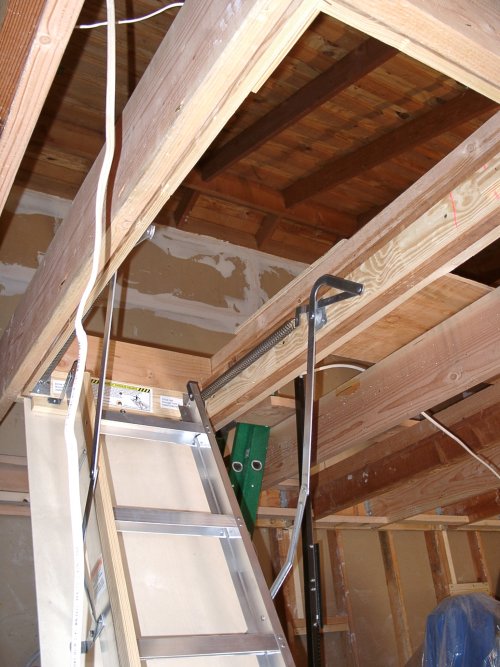
And now, the new pulldown stair access goes in.

Top view.
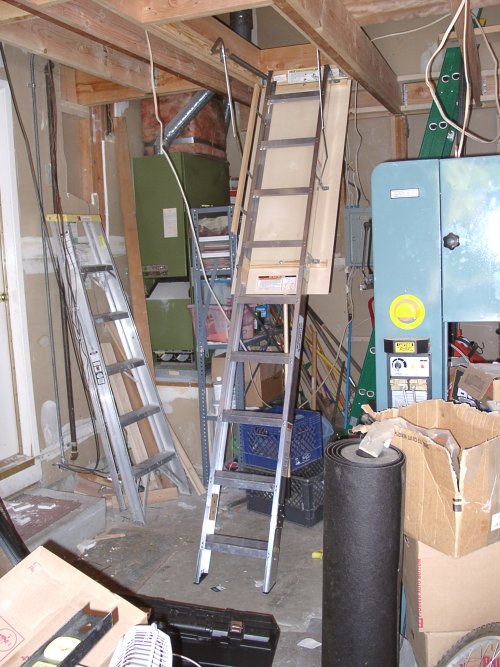
And extended !
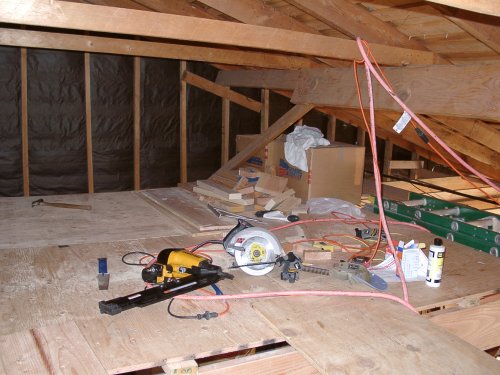
And above, just for fun, is the new garage attic space. Those platforms are temporary. I did this to use the above garage space as a work platform. It serves ok for that, but there is no ventilation up there, and it gets pretty hot.
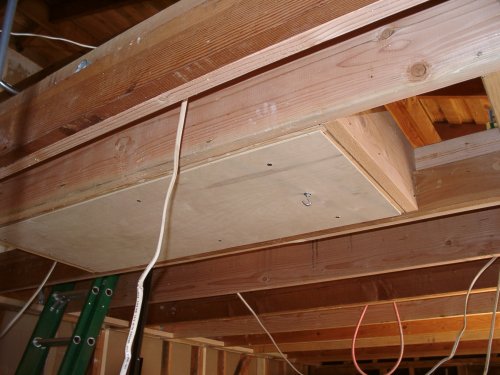
Now, on to lighting. Every third joist space gets a 8 foot lightwell, which are placed up between the joists:
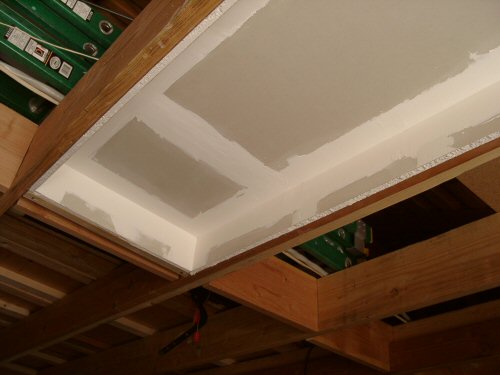
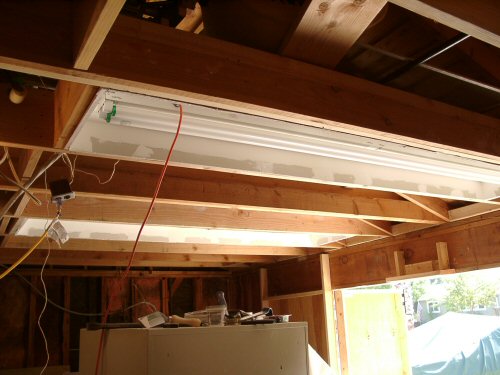
The drywall lightwells are required for fire safety. Here, the first 8 foot fixture is plugged in via standard power cord for testing. It will get rewired with romex from the top. The neat thing about the lightwells vs. just mounting the lights on the ceiling is that they don't subtract from the shop headroom, which remains 8'5" tall. There will be a total of 6 such light fixtures, spaced about 6 feet apart, so the final shop should be well lit.